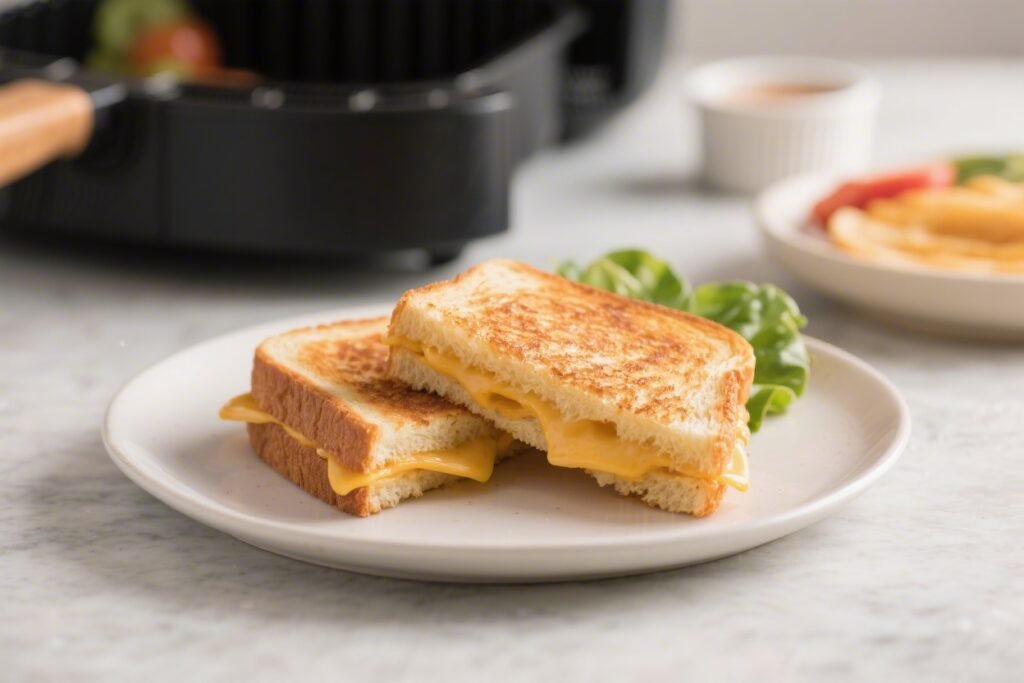
This air fryer grilled cheese hits that sweet spot of crispy on the outside and melty in the middle, without babysitting a skillet. It’s fast, predictable, and perfect for busy school days or lazy weekends. Kids love the golden crunch, and you’ll love that it takes just a few minutes with minimal mess.
Even better, you can customize it with fun add-ins or keep it classic for picky eaters. If you’re new to the air fryer, this is a great first recipe to try.

Easy Air Fryer Grilled Cheese for Kids Lunch - Simple, Gooey, and Fast
Ingredients
- 4 slices sandwich bread (white, sourdough, or whole wheat)
- 4 slices cheese (American, mild cheddar, Colby Jack, or provolone)
- 2 tablespoons softened butter or mayonnaise (for spreading)
- Optional: 1 teaspoon honey mustard or ketchup for dipping
- Optional add-ins: thin tomato slices, turkey, ham, or a sprinkle of garlic powder
Instructions
- Preheat your air fryer to 370°F (188°C) for 3–4 minutes. A hot basket helps crisp the bread faster.
- Spread the bread: Lightly coat one side of each slice with butter or mayo. Make sure you reach the edges for even browning.
- Assemble the sandwiches: Place one slice of cheese between two slices of bread, buttered sides facing out.For extra gooeyness, use two slices of cheese per sandwich.
- Secure if needed: If your bread is puffy or the cheese wants to slide, press gently or add a toothpick through the corner to keep it together. Remove the toothpick before serving.
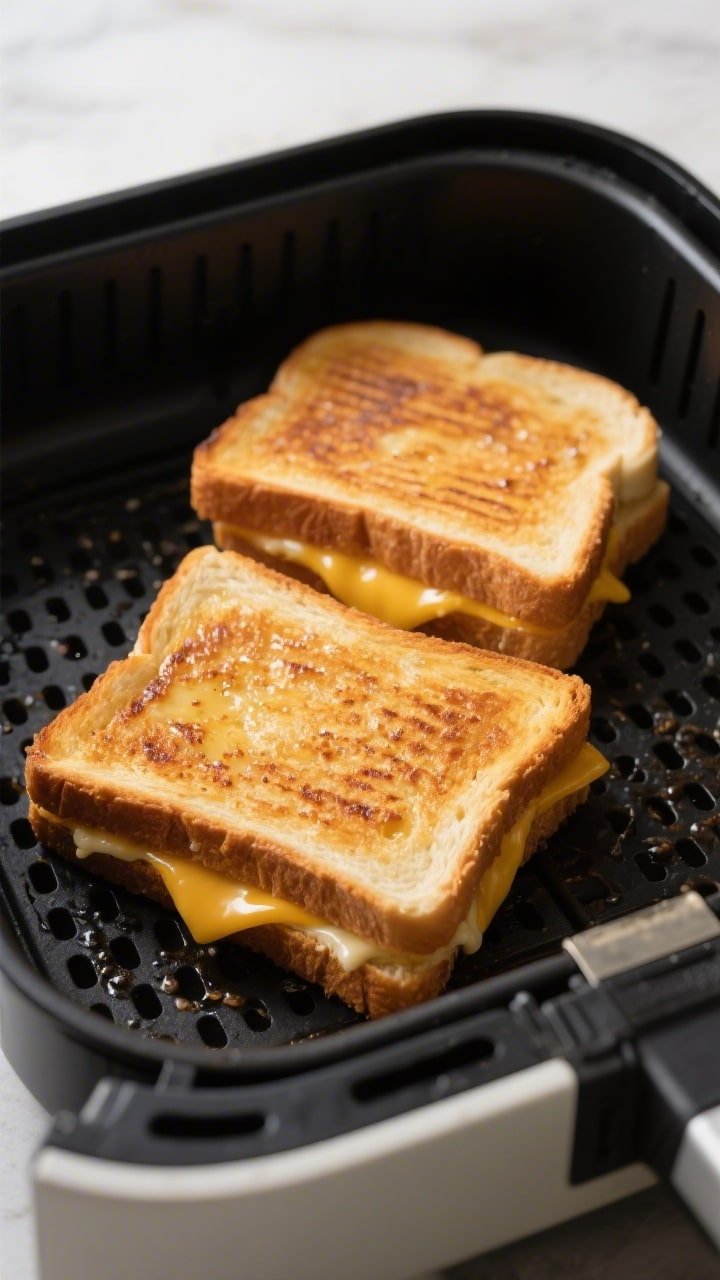
- Air fry the first side for 4 minutes at 370°F. Place the sandwiches in a single layer in the basket.Don’t overcrowd; cook in batches if necessary.
- Flip carefully and air fry for another 3–4 minutes, until the bread is golden and the cheese is fully melted. If the tops are browning too quickly, lower the temp to 350°F and add 1 minute.
- Rest for 1–2 minutes before slicing. This helps the cheese set slightly so it doesn’t ooze out.
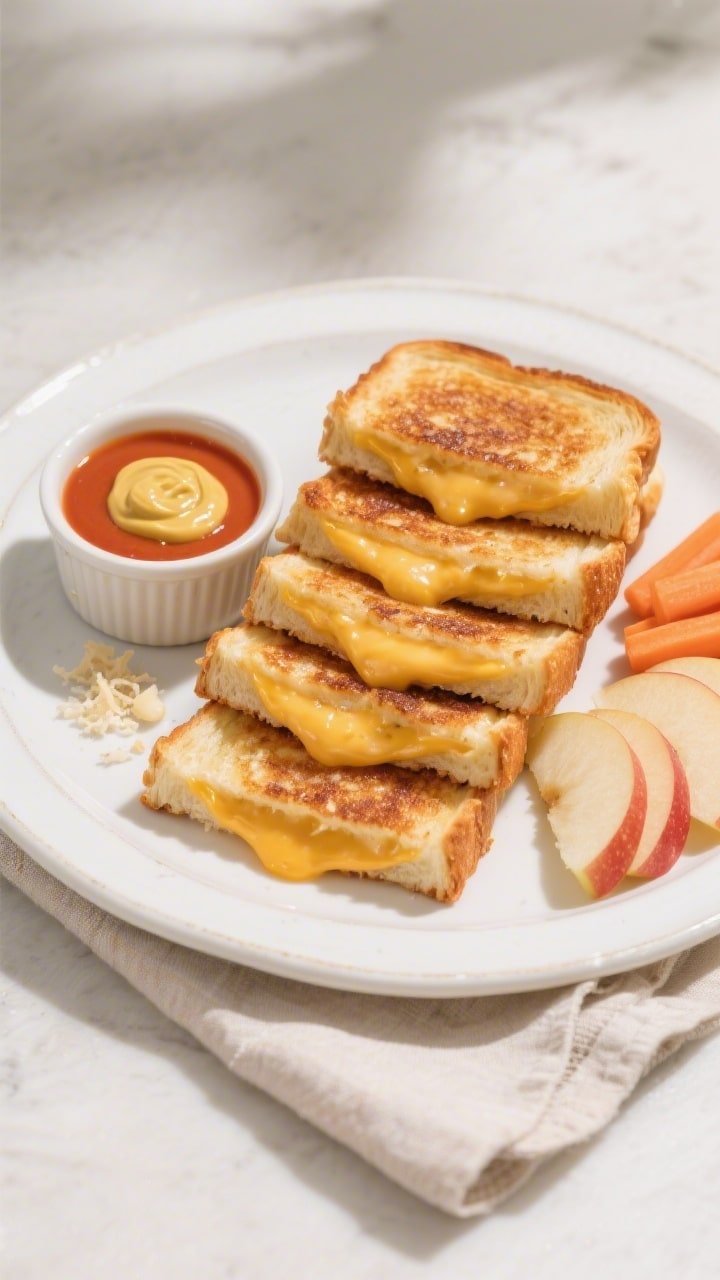
- Serve warm with fruit, carrot sticks, or a small cup of tomato soup for dipping.
What Makes This Special
- Hands-off cooking: No flipping on the stove. The air fryer does the work, and the cheese melts evenly.
- Consistent crunch: You get that crisp, buttery finish every time—no soggy bottoms.
- Kid-friendly flavors: Simple ingredients, easy to eat, and easy to customize for taste or dietary needs.
- Fast cleanup: No splatter or greasy pan.The basket wipes clean quickly.
- Perfect for meal prep: Make a batch, slice into sticks, and reheat for quick lunches.
Ingredients
- 4 slices sandwich bread (white, sourdough, or whole wheat)
- 4 slices cheese (American, mild cheddar, Colby Jack, or provolone)
- 2 tablespoons softened butter or mayonnaise (for spreading)
- Optional: 1 teaspoon honey mustard or ketchup for dipping
- Optional add-ins: thin tomato slices, turkey, ham, or a sprinkle of garlic powder
Step-by-Step Instructions
- Preheat your air fryer to 370°F (188°C) for 3–4 minutes. A hot basket helps crisp the bread faster.
- Spread the bread: Lightly coat one side of each slice with butter or mayo. Make sure you reach the edges for even browning.
- Assemble the sandwiches: Place one slice of cheese between two slices of bread, buttered sides facing out.For extra gooeyness, use two slices of cheese per sandwich.
- Secure if needed: If your bread is puffy or the cheese wants to slide, press gently or add a toothpick through the corner to keep it together. Remove the toothpick before serving.
- Air fry the first side for 4 minutes at 370°F. Place the sandwiches in a single layer in the basket.Don’t overcrowd; cook in batches if necessary.
- Flip carefully and air fry for another 3–4 minutes, until the bread is golden and the cheese is fully melted. If the tops are browning too quickly, lower the temp to 350°F and add 1 minute.
- Rest for 1–2 minutes before slicing. This helps the cheese set slightly so it doesn’t ooze out.
- Serve warm with fruit, carrot sticks, or a small cup of tomato soup for dipping.
Storage Instructions
- Refrigerate: Cool completely, then store in an airtight container for up to 3 days.
- Reheat in the air fryer: 320°F (160°C) for 3–4 minutes to bring back the crisp.Avoid the microwave—it makes the bread rubbery.
- Freeze: Wrap individually in foil or parchment, place in a freezer bag, and freeze up to 1 month. Reheat from frozen at 350°F for 6–8 minutes, flipping halfway.
- Pack for lunch: If packing in a lunchbox, slice into sticks and wrap in foil. Add a small ice pack to keep it safe and pair with crunchy sides.
Benefits of This Recipe
- Quick and consistent: Ready in under 10 minutes with no guesswork.
- Kid-approved textures: Crisp edges and stretchy cheese keep it fun and satisfying.
- Budget-friendly: Uses pantry staples and flexible ingredients.
- Customizable nutrition: Use whole grain bread, add protein like turkey, or sneak in a thin veggie slice.
- Less mess: Fewer dishes and no stovetop splatter.
What Not to Do
- Don’t skip the spread: Dry bread won’t brown well.A thin layer of butter or mayo is key for that golden crust.
- Don’t stack sandwiches: Overcrowding prevents crisping. Cook in a single layer.
- Don’t use thick, watery add-ins: Large tomato slices or wet veggies can make the bread soggy. Keep add-ins thin and pat them dry.
- Don’t crank the heat too high: High temps brown the outside too fast while the cheese stays firm.Stick to 350–370°F.
- Don’t slice immediately: Give it a minute to set so the cheese doesn’t spill out.
Recipe Variations
- Classic American: White bread + American cheese. Ultra-melty and simple.
- Cheddar and Apple: Mild cheddar with very thin apple slices for a sweet crunch.
- Turkey Melt: Add a thin layer of deli turkey and a slice of provolone.
- Pizza Grilled Cheese: Spread a teaspoon of pizza sauce inside and add mozzarella. Serve with extra sauce for dipping.
- Veggie Sneak: Add a few baby spinach leaves or a thin tomato slice (patted dry) with mozzarella.
- Garlic Butter Upgrade: Mix a pinch of garlic powder and a sprinkle of Parmesan into the butter before spreading.
- Dairy-Free: Use a plant-based butter and a good-quality dairy-free cheese slice that melts well.
- Gluten-Free: Swap in your favorite gluten-free sandwich bread and watch the cook time—it may brown faster.
FAQ
What’s the best cheese for kids?
American and mild cheddar are top picks because they melt smoothly and have a gentle flavor.
Colby Jack and provolone are also great if your child prefers something a bit less sharp.
Can I use mayonnaise instead of butter on the outside?
Yes. Mayo browns beautifully, spreads easily, and creates a crisp crust. The flavor is mild after cooking and most kids won’t notice a difference.
Do I need to line the air fryer basket?
Not usually.
If your basket sticks, use a light spritz of oil or a perforated parchment liner made for air fryers. Avoid solid parchment that blocks airflow.
How do I keep the cheese from leaking out?
Use sliced cheese that fits the bread, keep add-ins thin, and don’t overfill. Press the sandwich lightly before cooking, and let it rest for a minute after air frying.
What temperature should I use if my air fryer runs hot?
Drop to 350°F and add 1–2 minutes as needed.
Watch the first batch to find your perfect timing since air fryers vary.
Can I make this ahead for lunchboxes?
Yes. Cook, cool, and store in the fridge. Reheat in the air fryer in the morning, then wrap in foil.
It won’t be as crispy by lunchtime, but it will still taste great.
Is there a whole-grain version kids will like?
Use soft whole wheat or oatmeal bread and pair with a mild, creamy cheese. A touch of garlic butter on the outside helps keep the texture kid-friendly.
What sides go well with this?
Try apple slices, grapes, carrot sticks, cucumber coins, yogurt, or a small thermos of tomato soup. Simple dips like ketchup or ranch also work well.
How do I make it extra cheesy without a mess?
Use two slices of cheese but keep them 1/4 inch from the bread edges.
Let the sandwich rest 1–2 minutes after cooking to keep the cheese inside.
Can I use shredded cheese?
You can, but it’s messier and tends to leak. If you use it, pile it away from the edges and press the bread firmly. Slices are more reliable for air frying.
Final Thoughts
This easy air fryer grilled cheese is a lifesaver on busy days and a hit with kids of all ages.
It’s fast, comforting, and endlessly adaptable to what you have on hand. Keep the ingredients simple, watch the timing on your first batch, and you’ll have a new go-to lunch in no time. Serve it warm, slice it into dippable sticks, and enjoy the smiles at the table.